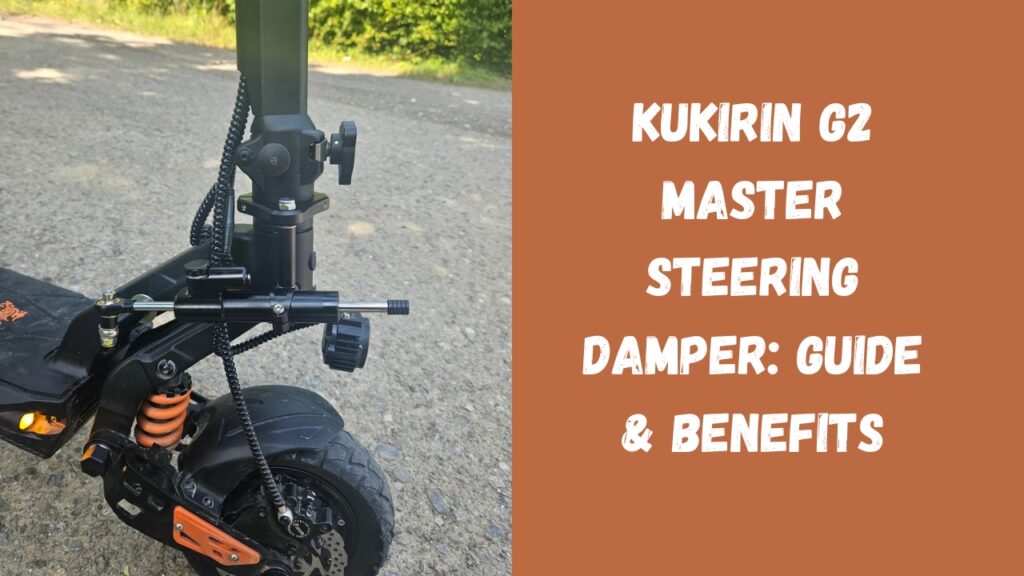
The Kukirin G2 Master has earned a reputation as a powerful and versatile electric scooter. Its speed, durability, and sleek design make it a top choice for both city commuting and weekend rides. However, like any high-performance scooter, it can experience steering instability and handlebar vibrations, especially on uneven roads. A steering damper is a simple but effective solution that can significantly enhance your riding experience. In this article, we’ll guide you through installation, benefits, common problems, and expert tips for maintaining your steering damper.

What is a Steering Damper?
A steering damper, also called a steering stabilizer, is a device that reduces the handlebar vibrations caused by bumps, potholes, or uneven terrain. It works by damping rapid steering movements, providing smoother and more stable rides. For scooters like the Kukirin G2 Master, which can reach high speeds, a steering damper is especially beneficial. It prevents wobbling, improves control, and makes long rides more comfortable.
How to Install a Steering Damper on the Kukirin G2 Master
Installing a steering damper on your G2 Master is straightforward if you follow the right steps. Here’s a guide for both beginners and experienced DIY enthusiasts:
- Choose the Right Damper
- Ensure compatibility with the G2 Master. Some riders have successfully adapted dampers from Ausom L2 Max models or used 3D-printed kits.
- Consider purchasing from trusted suppliers, like Aliexpress or official retailers.
- Gather Tools and Safety Gear
- Basic tools include Allen keys, screwdrivers, wrenches, and a torque wrench.
- Wear protective gloves and eyewear to prevent injuries.
- Prepare the Scooter
- Turn off the scooter and remove the battery if possible for safety.
- Clean the handlebar and front fork to ensure proper attachment.
- Mark the Mounting Points
- Depending on the damper type, you may need to drill small holes for bolts.
- Measure twice and mark carefully to avoid misalignment.
- Install the Damper
- Attach the damper to the handlebar and front fork using the provided bolts.
- Use a torque wrench to secure the bolts without over-tightening.
- Test and Adjust
- Before riding, check the damper movement. It should move smoothly without being too stiff or too loose.
- Adjust settings if the damper feels too restrictive or too soft.
Alternative installation methods include using a pre-drilled bracket or a 3D-printed kit. These options can save time and avoid drilling errors while still providing excellent stability.

Benefits of Installing a Steering Damper
A steering damper provides multiple benefits for G2 Master riders. It significantly improves stability by reducing handlebar wobble, particularly at higher speeds, and ensures a smoother ride by dampening vibrations from rough roads or potholes. The added control also enhances safety, helping to prevent accidents caused by sudden steering movements. Riders experience greater comfort, as the damper reduces arm fatigue during long journeys. Maintenance is minimal, requiring only occasional lubrication and inspection. Many users have reported a clear improvement in ride quality, even on challenging city streets.
Troubleshooting & Problem-Solving Tips
Even with a properly installed damper, minor issues may occur. Here’s how to handle them:
Damper Too Stiff:
Adjust the tension or replace the damper with a softer model.
Damper Too Loose:
Check bolt tightness and alignment. Loose dampers can worsen wobbling.
Unusual Noise:
Ensure bolts are secure and lubricate moving parts.
Vibrations Persist:
Check tire pressure, balance, and handlebar alignment. A damper works best with properly maintained wheels.
Installation Mistakes:
Double-check measurements and brackets. Avoid forcing bolts or misaligning parts.
Rider Experiences
Many G2 Master owners have shared positive feedback after installing a steering damper. Riders consistently report a significant reduction in handlebar vibrations, making rides much smoother on bumpy streets. The added stability at higher speeds also boosts confidence, allowing for safer commuting in both city and suburban environments. Additionally, DIY enthusiasts appreciate the option to install the damper using 3D-printed kits, which saves on professional installation costs while still delivering excellent performance. Overall, whether opting for a professional or DIY setup, the steering damper enhances comfort, control, and overall riding experience.
Conclusion
Installing a steering damper on the Kukirin G2 Master is a small investment that can make a huge difference in ride quality, comfort, and safety. Whether you’re commuting in the city or riding on rough paths, a damper reduces vibrations, improves stability, and enhances overall confidence. Follow proper installation steps, adjust settings to your preference, and maintain the damper for long-lasting performance.
For riders seeking smoother rides and safer handling, the steering damper is a must-have upgrade for the Kukirin G2 Master. Explore compatible dampers, follow installation tips, and enjoy a more stable, comfortable ride every time.

